Stair Lift Installation: What to Expect From Start to Finish
Step-by-step guide to stair lift installation process, timeline, and what to prepare. Covers measurement, customization, and post-installation care.

Demystifying the Stair Lift Installation Process
You know how most home accessibility projects involve weeks of drywall dust and contractor noise.
We find that most families expect the same chaos when buying a stair lift.
The reality is actually much cleaner.
We see typical installations completed in hours rather than days.
A standard straight stair lift often takes our teams as little as two to four hours to finish.
This process requires zero structural changes to your walls.
Your staircase remains fully usable for the rest of the family immediately after we leave.
We have outlined the exact roadmap below.
This guide covers everything from the initial survey to the final safety check.
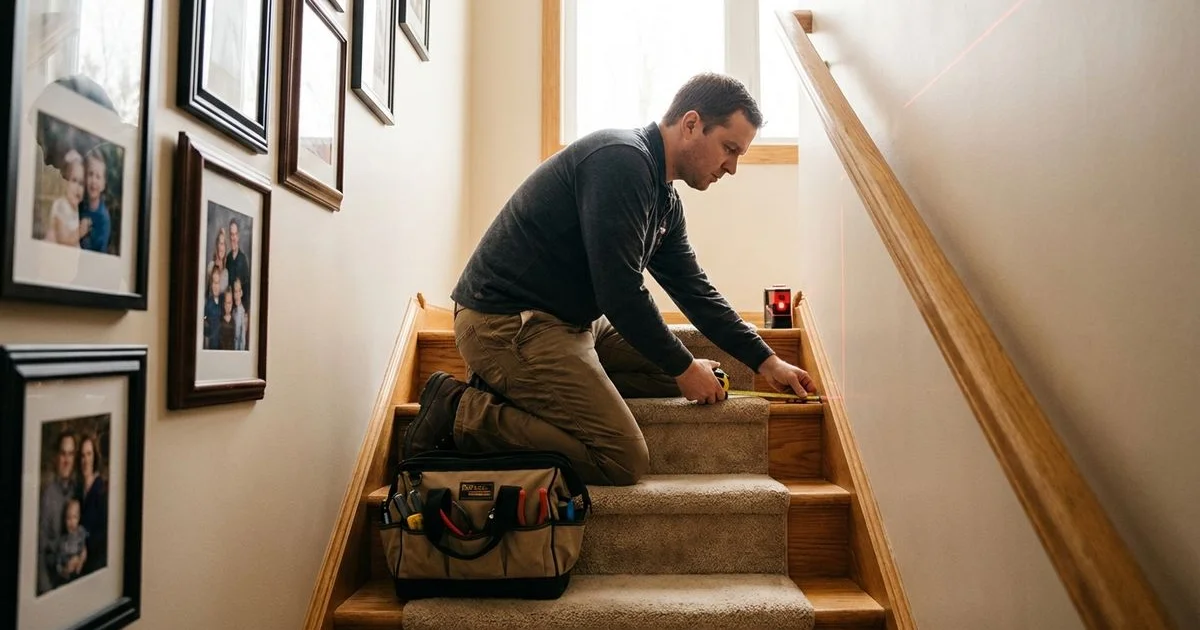
Phase 1: The Home Survey and Measurement
Timeline: 30 to 60 minutes Who’s involved: Certified installer or sales representative
We always start with a precise on-site assessment.
Remote quotes based on photos often lead to installation errors or safety hazards.
A trained professional needs to verify the specific geometry of your stairs.
We use this time to identify potential obstructions that a camera might miss.
What the Surveyor Evaluates
We look at more than just the length of the staircase.
Successful installation depends on specific clearance data.
- Staircase width: Most lifts require a staircase width of at least 30 to 32 inches.
- Knee clearance: The distance from the user’s knees to the opposite wall during travel.
- obstructions: Window sills, radiators, or door frames that might block the rail.
- Electrical access: Verification of a standard 120V outlet within 10 feet of the top or bottom landing.
- User metrics: The primary user’s weight and seated height to determine the correct chair model.
What to Prepare
We suggest clearing the staircase of loose items like throw rugs or potted plants before the surveyor arrives.
The surveyor needs clear access to measure every tread.
Having the primary user present allows us to demonstrate seat heights and control options directly.
Pro Tip: Ask about the “hinged rail” option during this visit. If you have a doorway at the very bottom of the stairs, a standard rail might present a tripping hazard. A hinged rail folds up automatically when not in use to keep that walkway clear.
Phase 2: Ordering and Lead Time
Timeline: 1 to 5 days (straight) or 3 to 5 weeks (curved)
We can typically schedule straight stair lift installations very quickly.
Manufacturers cut these straight rails from stocked inventory.
Our teams often complete these jobs within a week of the survey.
Curved stair lifts operate differently.
We must order a custom-fabricated rail to match the specific bends and turns of your home.
The surveyor often uses a photogrammetry camera system to create a 3D digital model of your stairs.
This data goes to the factory where the rail is bent to those exact specifications.
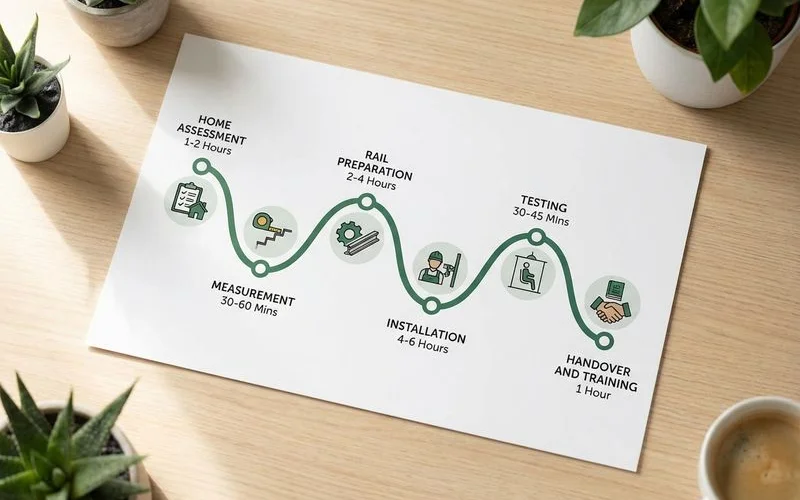 The complete stair lift installation process typically takes 2 to 8 hours depending on type
Phase 3: Pre-Installation Preparation
Timeline: 15 to 30 minutes before installer arrives
We recommend a few simple steps to make the installation day go faster.
You can handle these items the morning of the appointment.
Preparation Checklist
- Clear the landing zones: Ensure there is at least 3 feet of open space at the top and bottom of the stairs.
- Remove wall decor: Take down picture frames or mirrors hanging directly on the staircase wall to prevent accidental bumps.
- Verify power: Check that the dedicated outlet near the stairs is active and not controlled by a light switch.
- Secure pets: Keep dogs and cats in a separate room.
- Create parking space: The installer will need a spot close to the entry for unloading heavy rail sections.
What to Expect Regarding Stair Access
We will need to block the staircase entirely during the installation window.
Drills and rail sections will occupy the steps.
Family members should bring any necessary items like medications or chargers to the ground floor before we begin.
Phase 4: The Installation Process
Timeline: 2 to 4 hours (straight) or 4 to 8 hours (curved)
We follow a strict safety protocol during every installation.
The process is systematic and designed to protect your home.
Step 1: Rail Mounting (45 to 90 minutes)
We attach the aluminum rail directly to the stair treads.
Many homeowners mistakenly believe the rail attaches to the wall.
This tread-mounting method offers superior stability and preserves your drywall or plaster.
The brackets screw into the wood or concrete of the steps.
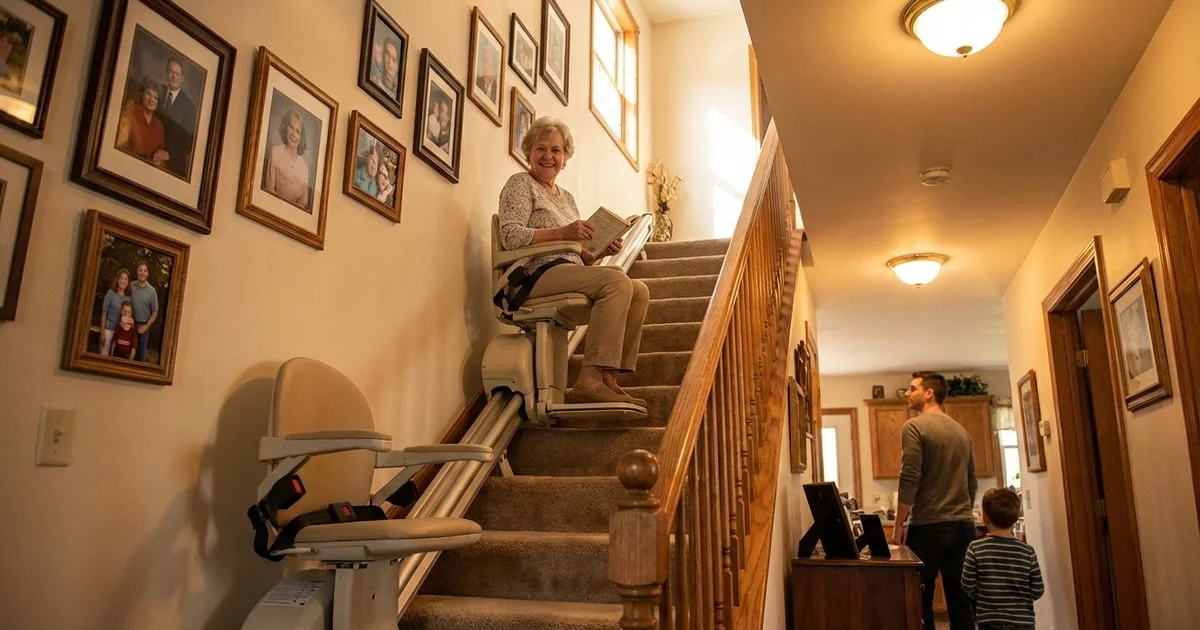
We typically position the rail on the wall side of the staircase.
This placement leaves the banister side open for other people walking up and down.
Step 2: Electrical Connection (15 to 30 minutes)
We plug the unit into your standard household outlet.
No electrician is usually required for this step.
The lift uses a “trickle charge” system to keep the internal batteries full.
We secure the wire neatly against the wall or baseboard to prevent tripping.
Step 3: Chair Assembly and Mounting (30 to 60 minutes)
We slide the carriage unit onto the rail once the track is secure.
This unit houses the motor, gears, and battery logic.
The installer then attaches the seat, backrest, and footrest.
We ensure all folding mechanisms operate with a gentle push.
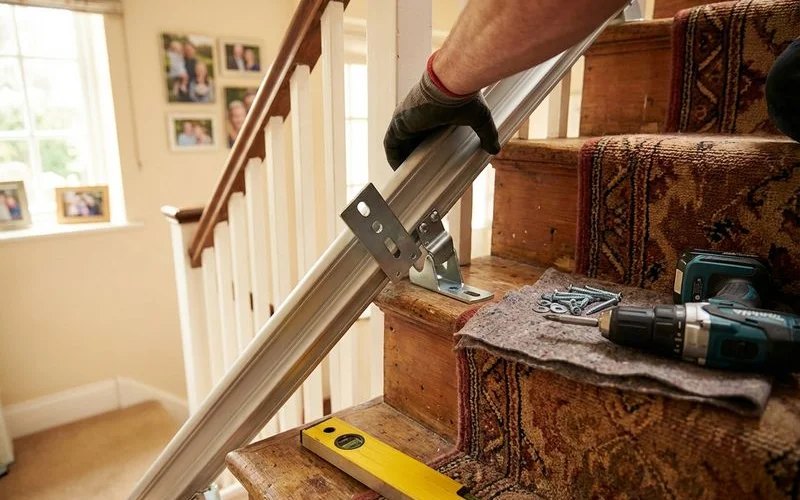 Rails mount directly to stair treads, not to walls, preserving structural integrity
Step 4: Safety System Testing (15 to 30 minutes)
We test every sensor before handing over the remote.
Adherence to ASME A18.1 safety standards is our baseline for these checks.
| Safety Feature | Test Performed |
|---|---|
| Seat belt | Verified for secure locking and easy release (retractable vs. velcro). |
| Obstruction sensors | We place an object on the stairs to ensure the lift stops instantly upon contact. |
| Swivel lock | Confirmed that the seat locks firmly at 45 and 90 degrees at the top landing. |
| Battery backup | Power acts disconnected to prove the lift works during an outage. |
| Overspeed governor | Mechanical brake check to ensure controlled descent speed. |
Step 5: User Training and Demonstration (15 to 30 minutes)
We spend the final portion of the visit training the primary user.
Comfort with the controls is just as important as the mechanical installation.
The installer will have the user ride the lift up and down several times.
We demonstrate how to use the remote controls to “call” or “send” the chair to a different floor.
Phase 5: Post-Installation
Immediate Adjustments
We often find that minor tweaks help user comfort in the first week.
Adjusting the seat height or the angle of the footrest can make a big difference.
Most reputable providers offer a 30-day window for these free adjustments.
Ongoing Maintenance
We advise treating your stair lift like a major appliance.
Regular attention prevents costly repairs later.
- Weekly: Wipe down the rail with a dry, anti-static cloth to remove dust.
- Monthly: Check the seat belt and listen for any new squeaks.
- Annually: Schedule a professional inspection to test the motor brushes and safety circuits.
- Every 3-5 Years: Replace the two 12V batteries housed inside the carriage.
Warranty Coverage
We see standard warranties vary by manufacturer.
You should expect the following coverage baselines from major brands.
- Motor/Gearbox: Limited Lifetime (often 10 years to lifetime).
- Components: 2 to 5 years on circuit boards and rails.
- Batteries: 1 year (these are consumables).
- Labor: 1 year (provided by the local installation company).
Common Concerns Addressed
Will the stair lift damage my stairs?
We mount the brackets through the carpet and into the tread.
Removing the lift leaves small screw holes about the size of a pencil width.
You can easily fill these holes or steam the carpet to hide the indentations.
Can other people still use the stairs?
We select models that fold up compactly.
The typical folded profile is only 11 to 13 inches from the wall.
This leaves plenty of walking space for family members on a standard 36-inch wide staircase.
How loud is the operation?
We install units that operate at roughly 50 decibels.
This volume is comparable to a quiet refrigerator hum or a library whisper.
You will not hear the lift operating from another room.
What happens during a power outage?
We rely on battery power for the actual movement of the chair.
The lift continues to work for 10 to 20 trips even if your home loses electricity.
This feature is standard on all modern lifts certified for US markets.
Next Steps
We encourage you to look at the specific features that match your mobility level.
Our comprehensive stair lift buying guide breaks down the cost differences between models.
You might also find that a lift isn’t the only solution.
Some families prefer alternatives to stair lifts like platform lifts or home elevators.
We recommend a professional home safety assessment to get a clear picture of your options.
This installation process provides an immediate return on investment in safety.
Your loved one gains access to the entire home in a single afternoon.
Ready to Take Action?
Learn more about our comprehensive stair lifts solutions and how they can help your family.
Explore Stair Lifts About Margaret Chen
Certified Aging-in-Place Specialist & Senior Care Advisor
CAPS-certified senior care advisor with 15+ years helping families plan for safe aging at home.
Related Articles

7 Alternatives to Stair Lifts for Seniors Who Need Multi-Level Access
Explore alternatives to stair lifts including home elevators, platform lifts, main-floor living conversions, and portable options for multi-level homes.

5 Evidence-Based Benefits of Hydrotherapy for Seniors
Research-backed benefits of hydrotherapy walk-in tubs for arthritis, chronic pain, and mobility issues in older adults.
The Complete Stair Lift Buying Guide: Straight vs. Curved, Costs & Features
Everything you need to know before purchasing a stair lift: types, costs, features, installation process, and top-rated brands for 2026.